Where Do Rainbows Come From?

A History of The Armoured Wizard

This will be a long and rambling post, so get yourself a coffee, and a comfortable seat, and allow me to tell you a story …

Of Dwarves, and other things

When I was little, my parents read Tolkien’s “The Hobbit” as a bedtime story. This led, inevitably, to Dungeons and Dragons, and watching a multitude of Fantasy films. This has been a staple of my life ever since, and is where the name “Mad Dwarf” sprung up. Elves and Wizards, Swords and Shields, and particularly JRRT’s line:

Their caps were of iron, and they were shod with iron, and their faces were grim.

Which I thought (being a young child) to be particularly evocotive!

On The Making of Things
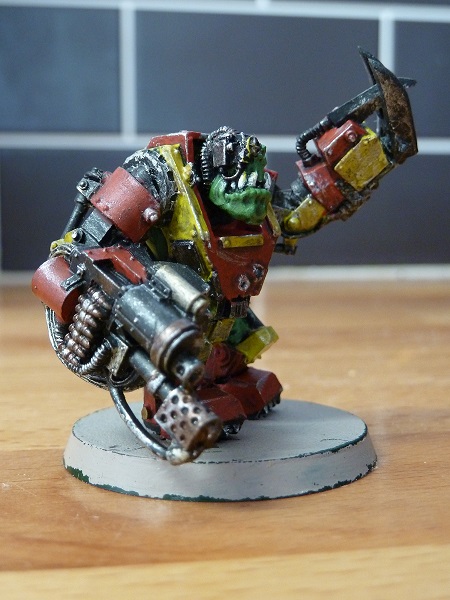
I do not remember a time when I did not make things. One of my earliest memories is making sand-castles in the sand-pit in our back garden. I painted toy soldiers for our D&D games, and made scenery for them (something that I still have a hankering for. cf: Everything Is Scenery )

At school, I took Ceramics ‘O’ Level, and also a couple of pottery night classes.

More recently, I delved into Electronics (having studied it at University).

On Dressing Up

As a child, we always had a “Dressing Up box”. Filled with old clothes, cowboy outfits, costume jewellery, and more, I would often drag it out of the cupboard and (similar to Mr Benn ) see what adventures I would be going on.

As a teenager, I shunned fashion, only to fall into the Rebel Uniform: black leather jacket, t-shirt with Band Photo or Album cover on, jeans (often ripped) and big boots! I adorned myself with studded wrist-bands, a bullet-belt, a denim jacket covered in ‘souvenir’ patches, and a well-coiffured ‘just-got-out-of-bed’ hairstyle.

But I also relished the opportunity to defy even that convention, and colourful waistcoats were added to my wardrobe, alongside black shirts and high-contrast accessories.

On More Recent Dressing Up

Back in 2017, @Lucretia told me that we would be attending the local Comic Convention. This seemed fair, I had expressed an interest, and gladly agreed. I was then asked what characters we would be going as … taken slightly aback, I suggested our favourite film characters: Merlin and Morgana from Excalibur.

A few short months later, and we had our costumes!

Since then we have created many more “cosplays” (as the kids call “fancy dress” these days). But recently, a new outfit was suggested: Geralt of Rivia (from “The Witcher” series of games and TV shows). @Lucretia would be Geralt, and I could be Yennefer the Sorceress, or Yaskier the Minstrell.

On The Actual Getting To The Actual Point Please

Geralt’s armour includes several armoured plates, made of interlocking maille. @Lucretia decided that, rather than use wool-painted-silver, or some other faux-mail, we should make “genuine” chainmail.

With my (above-documented) history in Making Things, Dressing Up, Fantasy, Armour, etc, I agreed that we were well-positioned to execute such a task.

And so, armed with pliers, and Amazon-sourced steel rings, we set about weaving (that’s what they call putting maille links together. And the different ‘patterns’ of maille are called “weaves”) sheets of European 4-in-1 maille.

Unfortunately, The Pandemic hit, and we were locked down. The project had to be put on hold.

On the Seriously, Getting to the Point Already!

So I’m all set up to make maille, but with no rings, no chance to work on the Armour, and lots of time on my hands (LockDown stopped me working).

Calling at my favourite Craft Supplier (Button Boutique), I inquired about more rings. They sent me to Instinct who gladly supplied me with a range of different rings, and I set about filling my time making them into Dice Bags (it is Law that all maillers must create a Journeyman’s Piece of a Dice Bag).

After a while, I’m bored of just plain dice bags, so I search out other things to be doing, and decide that a combination of lots-of-colours (rather than the plain steel or copper) with jewellery has only one logical direction:

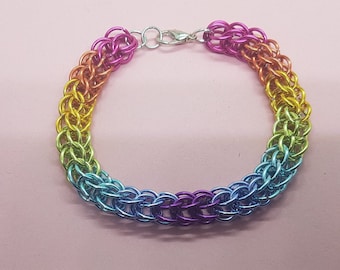
Rainbow Bracelets!

I source a selection of rings, and get to weaving!

Veering away from the E4-in-1, I spend some time trying to get the hang of Full Persian 6-in-1, and find it is actually quite simple. Related to the Box and Byzantine weaves I’ve toyed with. So away I go!

I tell people about it. They seem interested. I set up an Etsy Shop. People start to buy things!

So, there you go. How I got from there to here.

Now you go to there and buy one!
Let There Be Light!

As some of you may be aware, I have started making bags, pouches and jewellery from Chain Mail*.

Due to the nature of the items, and the prevailing conditions, I have been struggling to take good photographs of said items. So I have eventually relented and invested in a Light Box (and when I say “invested”, it was £11 from Amazon).

“So, is it any good?” I hear you ask. Well, let me explain …

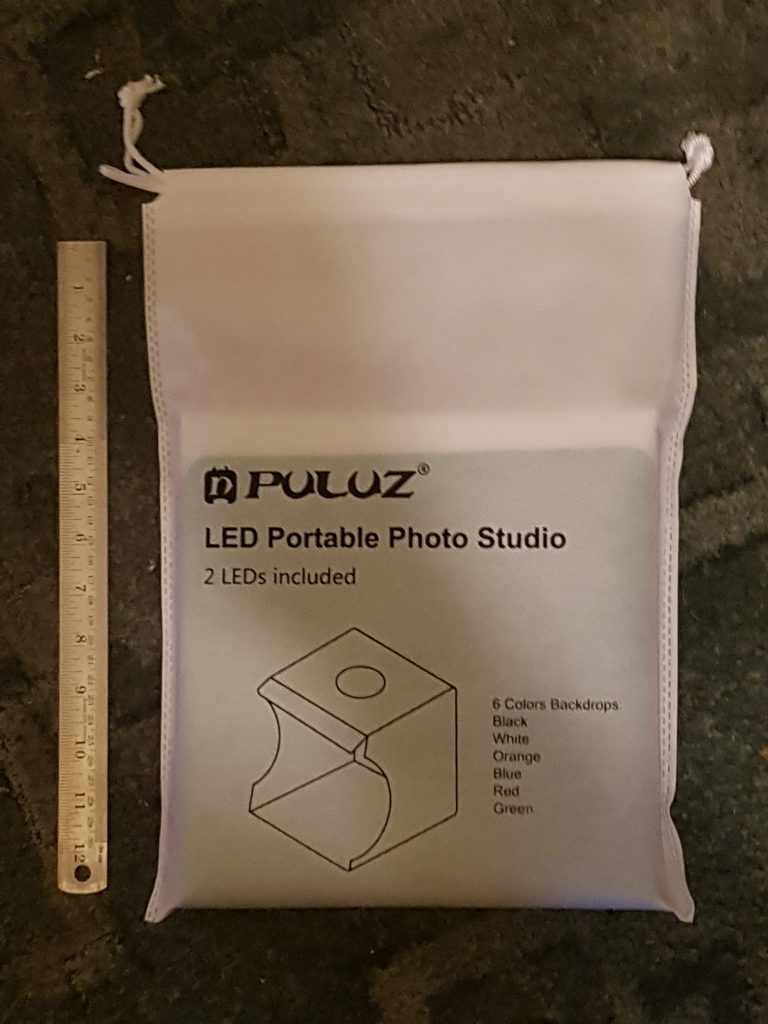
A bag containing my new light box

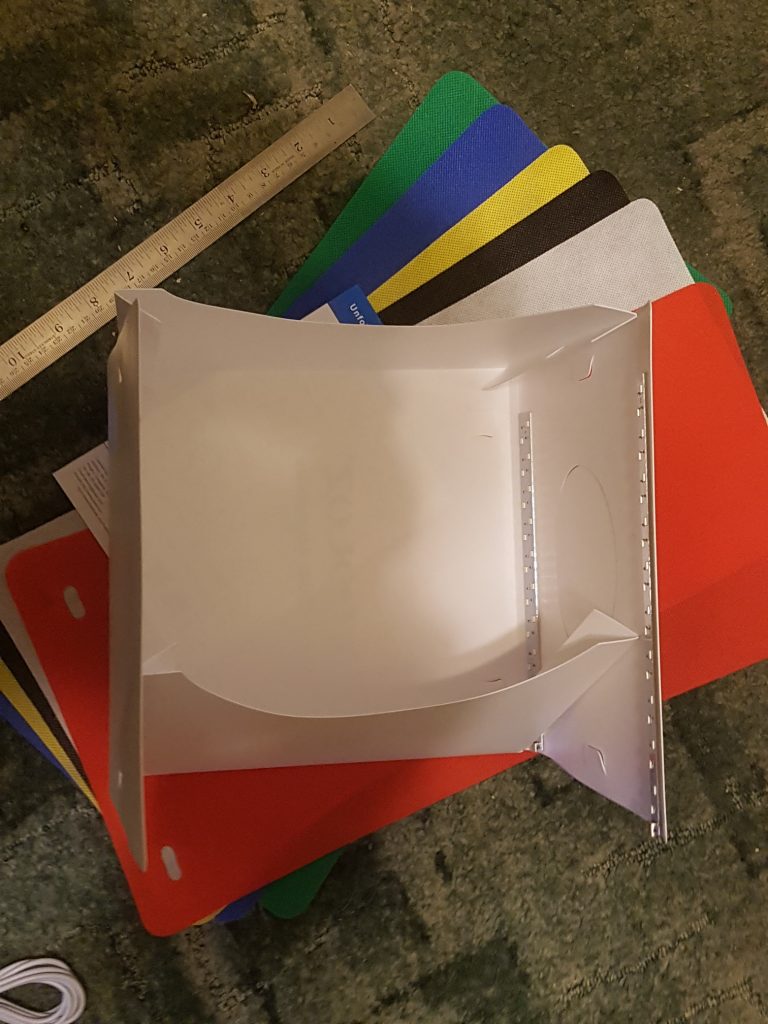
I opened the familiar Amazon parcel to find this little bag. Apparently the light-box is “portable”, and can be repackaged. It looks quite nice, anyway. So I emptied the contents, to see what I had bought.

My first reaction was one of disappointment. Cheap plastic tat. The background cloths were as cheap as the reviews I’d read mentioned. Not smooth at all. But there were several of them, and two USB leads, for the LED strip lights. (EDIT: on closer inspection, the USB leads are a 1-to-2, only requiring a single USB port to power both LED strips. I consider this a very good feature.

So, it is what it is.

To be honest, for £11, including next-day delivery, what did I expect?

So, on with the Unboxing. Or more accurately, the assembly:

Following the clear, concise instructions .. a ha, ha ha, ha ha!

Eventually, I got it folded the right way, and the little tabs correctly inserted in the right place! It did feel kinda flimsy while putting it together, but I think the plastic will hold up to a little manhandling.

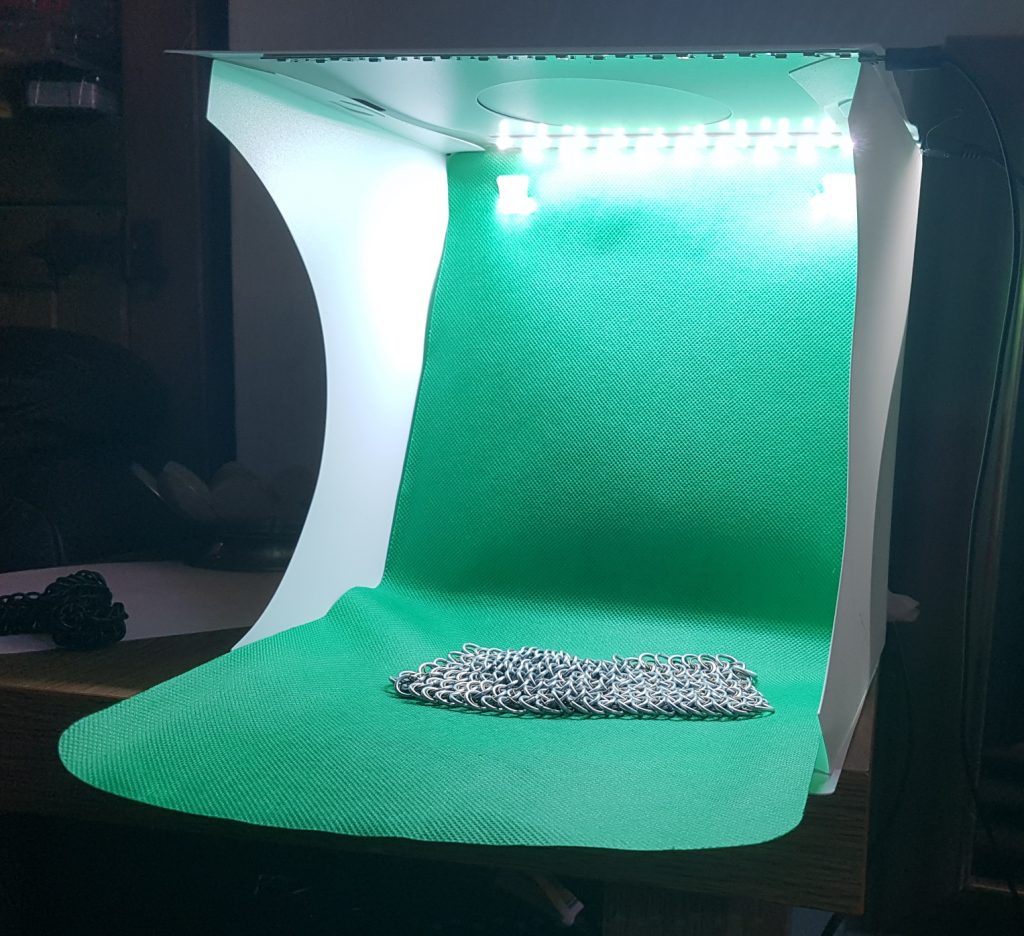
As you can see, there is a circular flap in the roof, so that one can take photographs from directly above. This was actually a selling point, over some of the other options in this price range.

Once assembled, it was actually reasonably rigid, and the background cloth easy to fit, and swap.

The LED lights are quite bright, but do not glare or shine too much. There is plenty of room to place, and manipulate, a piece of jewellery, or small sheet of mail. The cloth has a minor crease in, and does not lie flat, but this can be worked around (I’ll probably be using other backgrounds anyway).

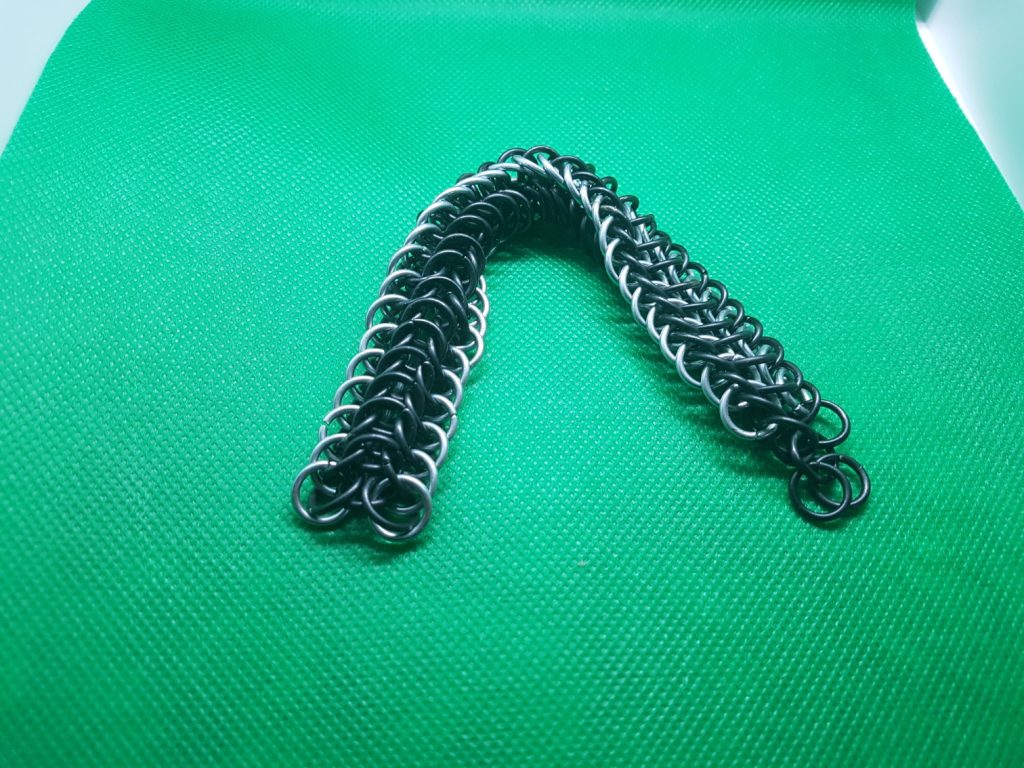
A quick snap with my phone (Samsung Galaxy 7 Edge) shows that the lighting makes a big difference.

I can now look at better positioning, cropping etc.

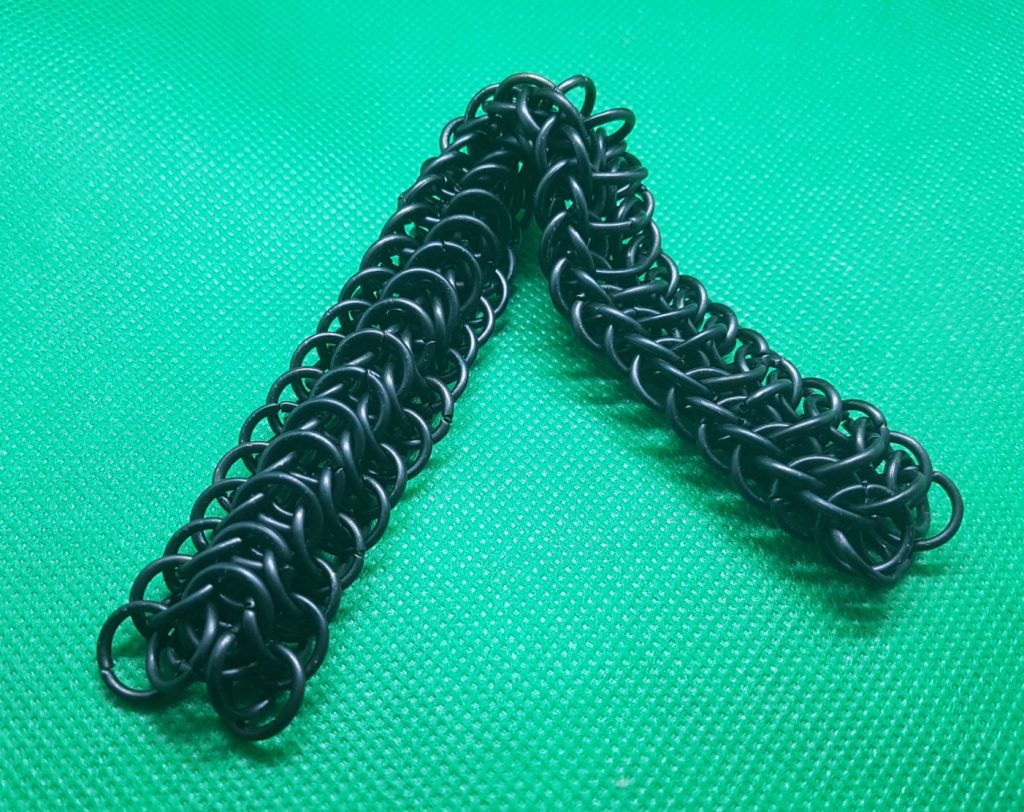
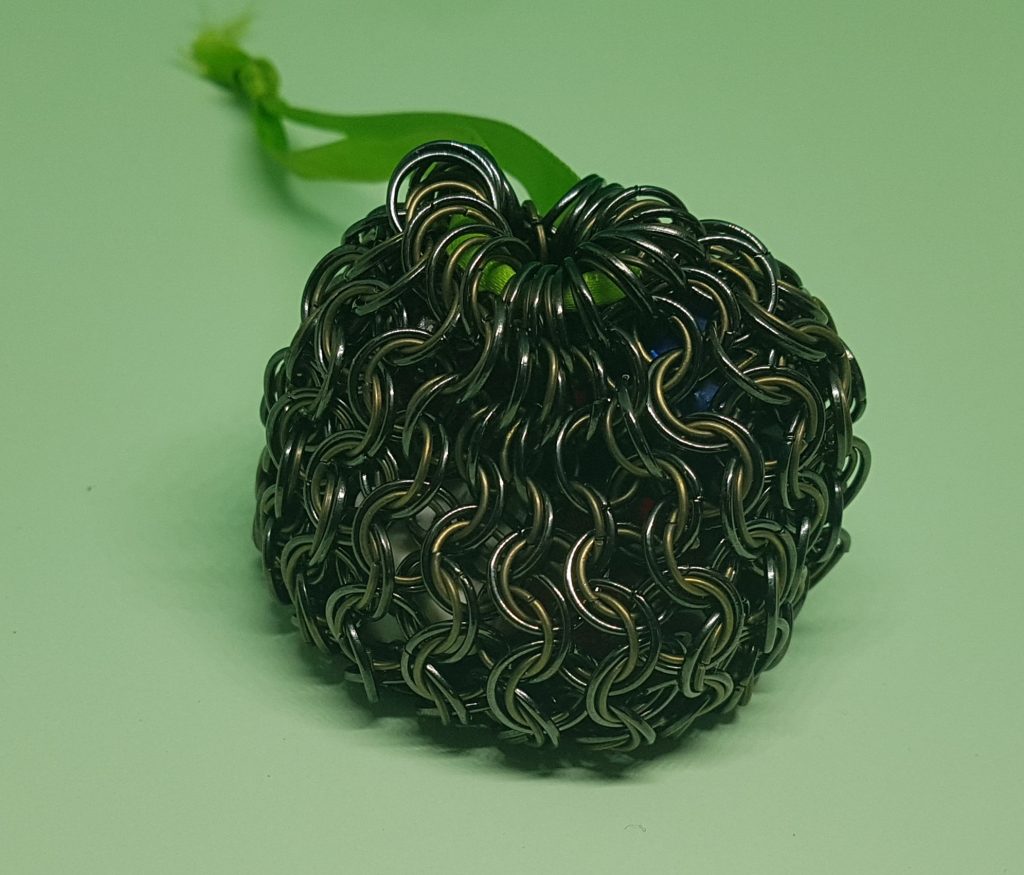
Even the Black rings show up well, with enough contrast between the rings, but no glare.

The background material is not great, but is good enough for now.

A sheet of pastel green A4 paper just fits nicely inside the box, so this could be a good way to go. Although I may use a different colour for this piece. It looks like it is picking up a lot of green reflection, although I think it is just the colours not meshing well.

More research needed.

I did de-assemble it, and try to squeeze it back into it’s travel-bag. The results were mixed. Probably good enough, if I’m careful with it.

So, overall, after a very quick test, I would say that this was £11 well spent! It works, the photographs are a lot better than previous attempts, and I hope they will be good enough to put in my Online Store!

If you are interested in ordering, or finding more information, I bought it from here:
https://www.amazon.co.uk/gp/product/B07DXW1R2L/

So, until my next post: Farewell, dear readers, and #StaySafe!

Footnote*
“Chain Mail”. The origin of the term “Mail” (or you may prefer the French spelling “Maille”) refers to a piece of armour (usually of linked rings), from the Latin for Mesh. Over the years, this has been corrupted to Chain Mail, and I use this term to avoid confusion with Postal Mail, or even Gender. Once this has been established, I tend to lapse back to “mail”.

The Onward March of Progress

How Two Generations Have Changed The World

My grandparents lived in back-to-back housing, with outside toilets, and no hot water.

The height of technology available to them was the Wireless. No, not “Wifi Internet Connection“. Radio. The BBC News Broadcast.

When one says “Almost 100 years ago …”, it is easy to think “oh, back in the Olden Days“, but my grandparents, that I knew and loved, lived through that.Image result for 1920s housing derby terraces

Although Electricity Suppliers were available, they were expensive and diverse, and it was not until 1935 the the National Grid was created, and it was unreliable until the ’60s. Houses were lit by gas, or candles, and most household tasks, such as laundry and cleaning were done by hand. There were no Automatic Washing Machines, or Dishwashers, or even Vacuum Cleaners.

Penicillin was not invented until 1928, and took years to be available to the general public. “The Youth of Today” do not realise what a Big Thing this is. Infections that we now think of as minor were considered Killers. My own father spent time as a child in an Isolation Hospital with Scarlet Fever.

So, your web-page is taking an extra 5 seconds to load? Cry me a river!

Managing Expectations

Everyone sees the world through their own experiences.

A public Telephone Box

My dad regales anyone who will listen with his tale of my nephew (his grandson. Now in his early 20s) asking what my dad’s first mobile phone was like, when he was a kid … cue “When I were a lad ...” Pythonesque rant. He had to walk down the street to a public telephone box. (For our younger readers, this is a Land Line, shared with everyone, situated at the Village Green. You  had to pre-pay shilling coins. People did not have their own land-line! ) But I digress. This is “New-Fangled Gadgets”

While I bemoaned my parents’ frugality (read: stinginess) regarding a VHS recorder, today’s hard-done-by children are rationed Mobile Phone credit and have curfews on their games consoles.

The youth of today have grown up with microprocessor technology. My niece had a mobile phone in her cot on Day One (playing soothing womb-sounds). Why would she not think everyone did?

Even those of us who remember dial-up internet (and its interminable screeching) now get frustrated at a 5-second delay on web-pages loading, or ‘buffering’ on our Netflix movies.

Time moves ever on, and we judge our relative position against those around us, not those who came before.

Next Generation

While my grandparents would be astounded at the technological accomplishments that we have made, and the ready availability of such, my generation will likely be just as amazed at what the next advancements will be.

Image from www.fanpop.com

A 1950s television.

From the 4″-9″ TV sets used to view the coronation of King George in 1937 to the 49″+ sets now used to watch ‘celebrities’ eating bugs, we have come a long way. Where next? There is talk of home projectors, or even Active Wallpaper, able to turn an entire wall of your living-room into a video display.

Our current Super-Fast broadband will be the poor-man’s speed of the 2020s. But what will this mean? Comparing to previous technology, we struggled to stream video, yet now it is expected, and even my parents have upgraded so that they can both be watching different programs (What? TWO computers? Are these people Aristocrats, or Merchant-Princes? Actually, they also have a laptop AND an iPad!) without buffering. They also both have mobile phones, which, in my opinion, are the major step forwards, and where the advancements will come.

On The Move

Imagine, if you can, dear reader, a time when all of the peoples of the world will carry a device that links them to every other person on the planet. At the touch of a button, they can call forth any piece of information from the Global Databases, read any book ever written, watch any movie ever made, or listen to any music ever recorded. The latest news from even the furthest reaches of the world are broadcast immediately to all of these devices. All of the Academic courses, History, Geography, Mathematics, Philosophy, the Arts, are there in your hand, and even Teachers available to discuss with.

That time, my friends, is upon us!

Related image

Alcatel Pixi 3. £20. All the phone you need.

Even my dad’s most basic of mobile ‘phone’s is capable of full internet access, and although its on-board processor is limited, it can off-load much of the work to online servers, storing photos and documents in The Cloud, utilising the network of “4G” Mobile Masts around the country.

The communicators, and even ‘tri-corders’ that Captain Kirk relied upon so much pale besides our “Phones”.

I have friends who no longer even use a Home Computer, their phones and tablets providing all of the functionality they need to survive a Modern Lifestyle, and the next generation will consider our desktop PCs quite quaint!

There may  be black-spots, and no-signal zones, but these are disappearing fast. Optical Fibre connections are being rolled out to even the most remote locations. Soon there will be no place without constant, reliable connection to the Global Village!

When the youngest of our families become grandparents, what marvels will the new generation be privy to?

Epilogue

It is my opinion that:

  1. The Internet, mobile phones, etc are a natural progression from Marconi’s initial radio experiments, and Shokley et al‘s transistors.
  2. We are still in the early days. Compare to other technologies in our homes: TV is nearly 100 years old. Radio even older. Electric lighting 150 years. We have a long way to go before Instant Global Communication is considered a mature technology, and it’s social effects (little touched upon here) are fully felt.


Red ‘ren, Soul of Egypt

Welcome back to the “I have a new car” blog!

KA

KA

Although Li’l Singin’ Suzie has not actually fallen apart at the seams, she has become unreliable, and less than melodic (especially on rough roads – everything rattles!). Some local ruffian has put a screwdriver through the passenger door lock, the repair of which left it non-functional. The window also fails to work. There are a couple of MOT Advisories,

Getting through this coming winter was looking like a worrying time.

As luck would have it, one of my Mother’s friends happened to mention that she rarely drives and was looking to get rid of her car. Knowing my situation, Mum asked her to consider us if she did decide to sell.

Long story short: I (with a little help from Dad) bought the car!

Technical Details:

  • Ford KA Zetec Climate 2007
  • Metallic red paint
  • Very low mileage
  • Very good condition (full service history)
  • One lady owner (two, if you count the lady who owned it for a whole month from new, before deciding it wasn’t for her!)

Pros:

  • Despite being 11 years old, she is in almost mint condition
  • 1300cc engine is notably more power than anything I’ve driven before (The Stallion had a 1600cc,  but a much heavier body, and was a bit older)
  • She has a reflection of the Sydney Opera House in the rear wing!

Sydney Opera House

Cons:

  • 1300cc engine is notably more power than anything I’ve driven before!
  • Can’t see the corners (my li’l bro noted that a KA has no corners!)
  • £195/year road tax!*

Worky Bits

I have figured where most of the important controls are, although I am settling into the “New Car Standard-Signalling Procedure”. The correct action when a new car approaches a junction is to switch on the windscreen wipers, and then indicate in both directions while changing radio stations. But you knew that.

I still don’t know how to get to the engine, but I hope that I never have to! My sister-in-law has had two KAs, and given me some suggestions, but she is of a similar “ring the RAC” mind as me.

Fuel

It’s a little early to comment on fuel consumption, but I feel that she may be a little thirsty. I’m still impressed at modern mileage figures, though. My initial estimate is approximately 45MPG. I hope to be able to get that up to 50, once I’m more familiar with the clutch and gears, and no longer massively over-revving on manoeuvring.

Suzie

Li’l Suzie (also known as The Car of Theseus) is being taken away later this week. While I am sad that our 4 year relationship is over, I know that she served me as well as she could.

Notes

Ka, his arms raised

Ka, his arms raised

You may be wondering where I got the title of this Blog Post. Well, sit back, and let me explain …

Red ‘ren, Soul of Egypt:

  • She is red. This part is not so puzzling.
  • KA ‘ren = Karen. If you’ve got a better name for a KA, please let me know!
  • Pharaoh Ka reigned Egypt circa 3200BC. His name means “soul”, as signified by the “raised arms” motif.

Going Forward

I don’t see my general attitude towards cars changing; keep them running until they are no longer economically viable. How much will it cost to get her through the next MOT? Hopefully, Red ‘ren will last a good few years before needing any major work, at which point, I will have to consider my options.


*Road Tax: Colloquial term for emissions-based Vehicle Excise Duty, a tax levied on all motor vehicles that use the public roads. The funds raised go in to the general Coffers, and are not ring-fenced for any particular purpose.

Stir Fry

How to Write a Food Blog

Like this:

Stir Fry

I got a new wok for Christmas, so I’m stir-frying quite a lot. Here is how I do it:

Recipe

Feeds 1 Hungry Wizard, or 2 Muggles (3, if you add a bit more Noodles)

Some meat (or not). I used 2 Pork Loins, cut into strips (about 240g total). Just over £1, as it was on a deal at Aldi. If you’re avoiding meat, a few more mushrooms helps.

Some veg. Today I bought a pack of “mushroom stir-fry veg” (325g). Just under £1 at Aldi. £1 at Asda/Tesco. £1.25 at Co-op. If making from scratch, I suggest per person:

  • 1/2 a small onion
  • a few mushrooms
  • a bit of cabbage or other greens
  • a small handful of beansprouts
  • 1/2 a carrot, grated

Make sure your veg are all different colours!

Sauce. You can make your own, but Aldi had either Sweet’n’Sour or Oyster’n’Onion packs at 35p! I went for S’n’S.

Noodles. I skipped them this time, but “Straight to Wok” noodles are cheap and plentiful. Don’t over-do it though! You’ll end up with NOODLE and stir-Fry!

Tools

1 Wok

1 stirring stick (wooden, so as not to scratch the wok)

1 Meat-cutting knife (unless you bought pre-chopped meat)

1 surface to chop meat on (see above)

1 eating-bowl and eating utensil per person (I use a fork. You may risk chop-sticks if you please)

Method

Read through the entire Method. Check you have got all of the ingredients and tools, and understand each process.

Get all the ingredients nearby. Check you have everything.

Chop your veg, if you didn’t buy pre-chopped. They want to be quite small, but not wafer-thin slivers. Or you can leave them chunky.

Heat a little oil (I use Spicy Stir-Fry Oil – adds a little kick, and resists the high temperatures) in a wok (High Heat. On my cooker, I use Level 5 (out of 6). You may choose to use ‘6’. I do not think ‘4’ is hot enough).

A little oil

A little oil

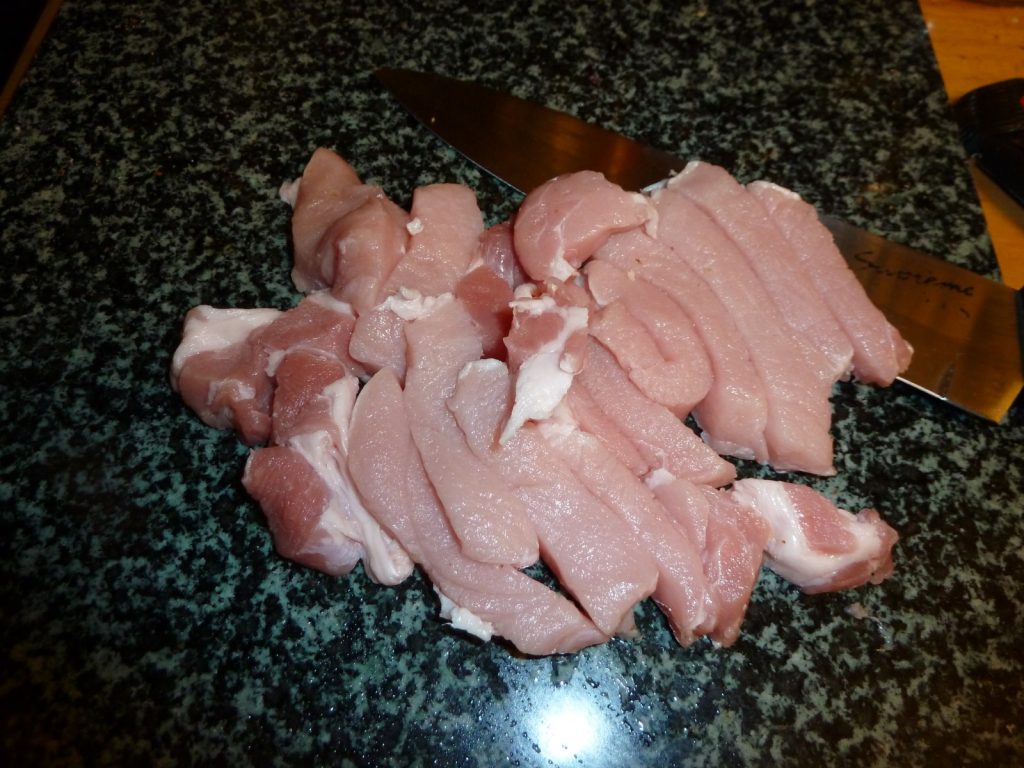
While the oil is heating, chop up your meat (unless you bought it pre-chopped, in which case, just wait for the oil to reach temperature! There should be just enough time to TXT a friend: “HEY! I’m Cooking! Yeah, me! Cooking! Gotta go, kitchen on fire!“).

Chopped Pork Loins

Chopped Pork Loins

The oil should be hot enough by now, but you can throw a little piece of meat in to check – it should sizzle!

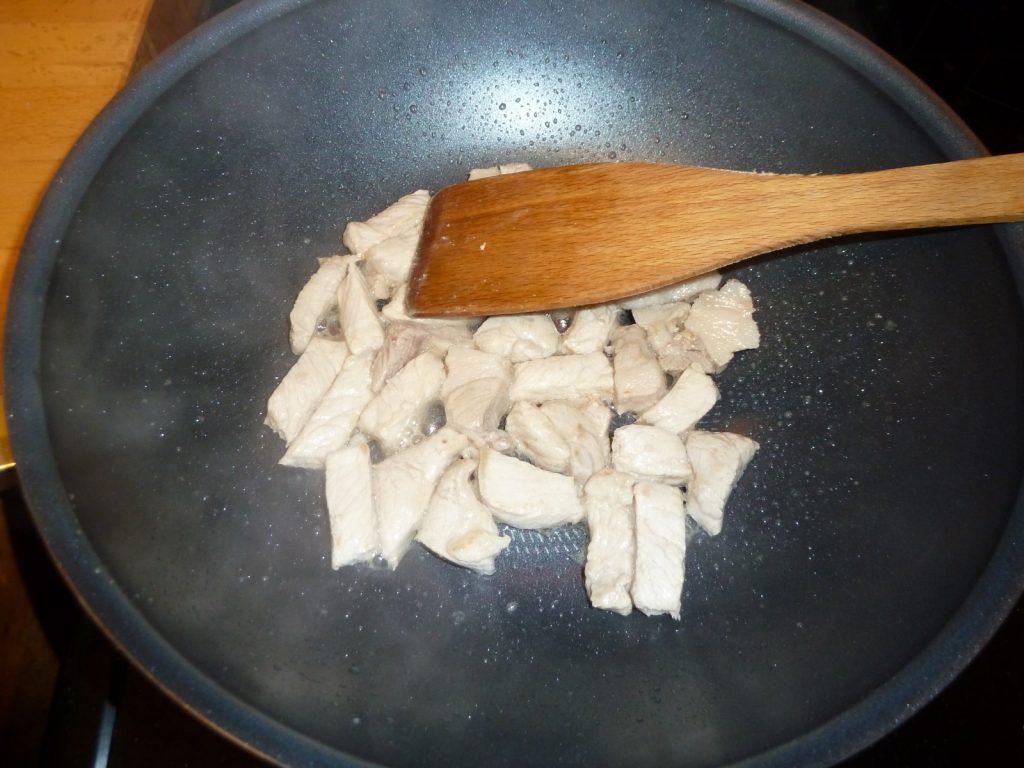
Carefully place the meat in the wok. Beware, it may splash hot oil!

Meat in Wok

The Meat Is In The Wok!

You can take a moment now, as the meat starts to cook, to clean down your meat-chopping surface. Be quick-but-thorough.

Now stir the meat (cf: name of dish!). Keep stirring, not too fast, until the meat is about cooked. Make sure to turn it over regularly, cooking all sides, and allowing the heat to reach the centre. This should take a few minutes. If, after 5 minutes, the meat is not starting to brown, you have the heat too low!

Cooked meat

The Meat is Cooked!

Blurry Photo

Blurry Photo

ASIDE: If you are blogging your meal, make sure not to get the camera too close! The steam will mist the lens, and may get inside the worky-bits. The auto-focus will struggle. Your photos will end up looking like this:

Use the Zoom function, from further away!

Now that the meat is cooked, and we have a decent photo of it, we can add the veg. Pop it all in the wok.

Now, with added Veg!

Now, with added Veg!

We now refer back to the Dish Name: Stir the veg (and meat!), turning over, and making sure it all gets nice and hot! A couple of minutes of stirring, and the veg will be starting to cook through, and wilt a little. It will be noticeably reduced in size.

Cooked Veg

Cooked Veg

We can now add the sauce. Depending on the sauce, this can be a bit messy. Sweet’n’Sour is sticky, and gets everywhere if you’re not careful!

Stir some more (are we getting an idea of where the name came from yet?). Don’t go splashing it everywhere, and throwing it all over the hob. A nice, gentle motion, just to keep it moving so it cooks evenly, and the sauce covers everything.

Ooh! Saucy!

Ooh! Saucy!

If you are using noodles, now is the time to add them! (I often skip them, but they do bulk it out nicely). Stir the noodles in, but no more than a minute (unless your packet says otherwise!).

The meal is now cooked, and can be spooned into bowls.

Pro-tip: keep the bowls very near the wok, so as not to spill food all over the oven/counter/floor!

Stir Fry

Stir Fry

Sit at your favourite table, and savour your creation!

SketchUp Three (Part Two) – Adding Details

Framework

Framework

If you’ve been following this series (Part OnePart TwoPart Three), you should now have a framework of a house. Now we shall add some extra features, and introduce some new techniques.

So, open up your House file, and also the blueprint you are working from, and we’ll jump in!

Doorways

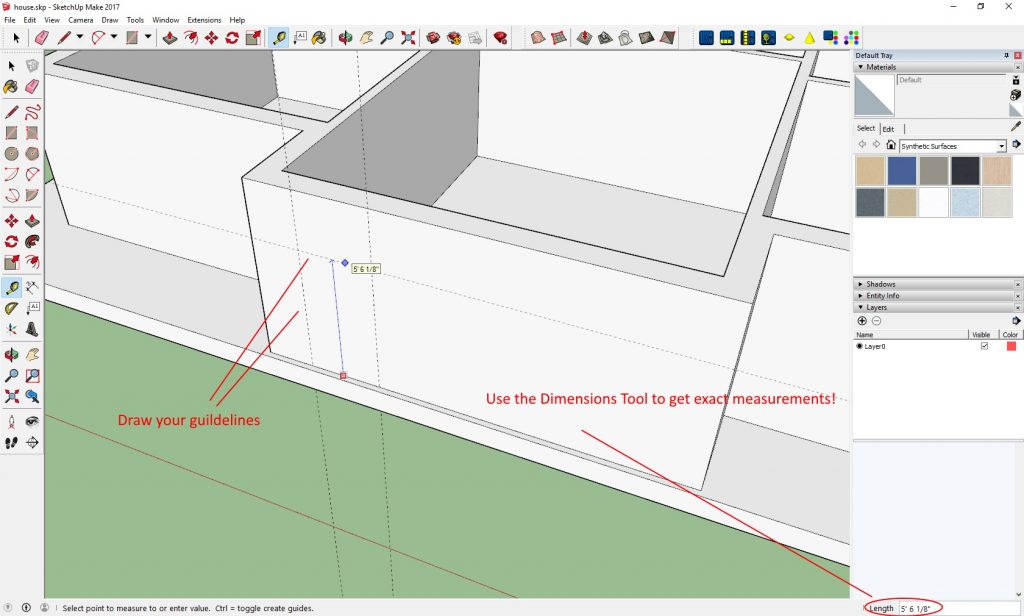
To get into the house, we are going to need some doorways. My research tells me that an average door is 36″ by 80″ (about 1m wide, 2m tall). On my blueprint, the front door is about two feet from the left corner, so lets start marking out these measurements:

Guide Lines

Guide Lines

Snap Effect in Action!

Snap Effect in Action!

Now draw a Rectangle for the doorway, and use the Push/Pull to create the doorway! The Snap-Effect will keep you lined up properly:

Now that we know how to make a doorway (Draw Guidelines using Measuring Tool, then Push/Pull to create gap), we should make all of our doorways.

By now, we will have covered our Scene in guidelines, and rather than helping, they will be getting in the way! We could go round and delete them one-by-one, but there is an easier way! The “Delete Guides” entry on the Edit Menu!

Delete The Guidelines

Delete The Guidelines

Window

Window

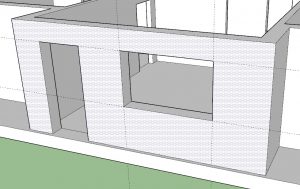
OK, that’s the doors … we need to do the same for the windows! For the purposes of this tutorial (and simplicity!), I will be having all of the windows start three feet from the floor, and the tops be level with the top of the doors (80″, remember? This is 6′ 8″, or about 2 meters in new money). Again, put some guides in place. I’m making the front window 6′ wide, placed approximately halfway between the door and the right corner. Then draw the rectangle, and Push/Pull it. Again, continue around the house, putting all of the windows in place.

Doors and Windows

Doors and Windows

Actual Doors and Windows

Now, we want to put the actual doors and windows in place! Now, we can design our own furniture, and we already have most of the tools to do so (Draw a rectangle 6′ 8″ x 3’6″, Push/Pull to 1″ thick, BAM! Door!). Or we can rely on the kindness of strangers!

The SketchUp Warehouse is a repository where anyone can upload their creations, for other people to use. Maybe you will upload something there one day? For now, head to the File Menu -> 3D Models -> Get Models …   This will open the Warehouse, and allow you to select items to insert into your scene! Enter a search term (e.g. “Door”) into the Search Box at the top, press Enter, and Presto! Doors appear! Take some time to browse around, see what people have uploaded. If you find a design that you like, select it, and you will be taken to it’s Page, where you have the options to view a 3D render of it (note: can take a little while to load), or to download it into your Scene. Scrolling down should reveal other items, including collections and models that this item has been used in. I’ll not get into the complicated sections for now: Find a door you like (I’ve chosen “Flush Door” by user: “Luncai”), hit Download, and load it directly into your model.

You will notice that the door is now free-floating, and you can move it around. Find some free space, and click. Note: Do not try to place it in a doorway yet! Drop it near the house, and we’ll come back to  it …

Interlude …

SketchUp Three: Building a House

In my previous two posts (One, Two), we learnt some basic techniques for creating models in SketchUp. Now, I am going to jump directly to using these, and other, techniques to build a detailed Scene.

Don’t worry if you struggle to follow this on the first time through! You can always start over, and slowly build up bit-by-bit!

Design Stage

Firstly, it is a good idea to have a plan in mind! Sure, we could just throw a Scene together, adjusting things as we go along, but I prefer to be building towards a Goal! With this in mind, we need a Plan! Searching Google for “royalty-free house floor plans” led me to http://anyaflow.com, where I downloaded this image:

Floor Plan

You may download it directly from me by clicking to show the full Image, and then Saving to your Downloads folder.

Now we can open SketchUp, and start to build!

Start at the bottom

Base

Base

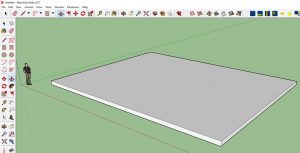
First, we need a surface to work on. Draw out a Rectangle, and size it to be a little bigger than the House will be. (In my example, we can see that the house will be 44’11” wide and 38’7″ long, so I will  make my Base 50’x40′. Remember that we can get exact dimensions by typing them!). I like to give the base some Thickness, so use the Push/Pull tool to bring it up by 1′.

Outline

Now we can start to build the outer walls.

New Tool: Tape Measure. Draw guide lines 1′ from the Right and Top edges.

Offset Tool

Offset Tool

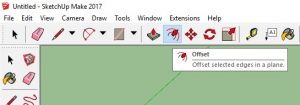
Using these guides, and the Snap Effect, we can draw some of the outer walls. Draw a Line from the intersection of the Guides, about 40′ across the top, and 30′ down the side. Then Select these two lines (Tip: Select one, hold CTRL and Select the other). You can now use the Offset Tool to drag a 1′ ‘copy’ of the Wall. You should have something looking like this:

The Walls So Far!

The Walls So Far!

Now, using the measurements supplied (or worked-out/guessed-at!), we can fill in the rest of the walls.

I used a combination of Drawing straight lines and Rectangles, using Snap Effects, typing Measurements, and Guide Lines (from the Tape Measure tool) to produce this:

Draft Floorplan

Draft Floorplan

Cleaning Up

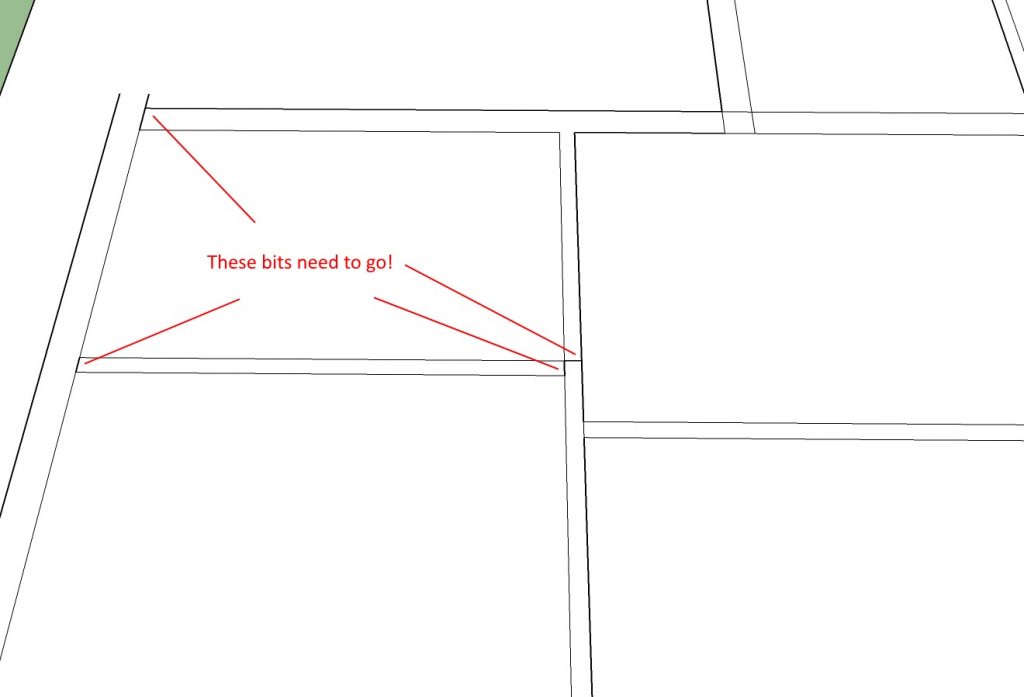
Now we can get rid of the Guides, and extraneous lines. The Guides are easy. Edit Menu -> Delete Guides! Trickier is erasing all of the extra lines, without clearing lines we want to keep!

Using the Eraser tool, trim the lines back, and also delete the lines “inside the walls:

Erase these bits!

Erase these bits!

We need to check that all of the Lines are connected. Select the Push/Pull tool, and hover over one of the walls. You should see that the entire wall section, and nothing else, is the familiar Spotty Blue. If this is not the case, draw over some of the lines, to make sure they are correctly aligned. You should have something like this:

Ready to Build Walls!

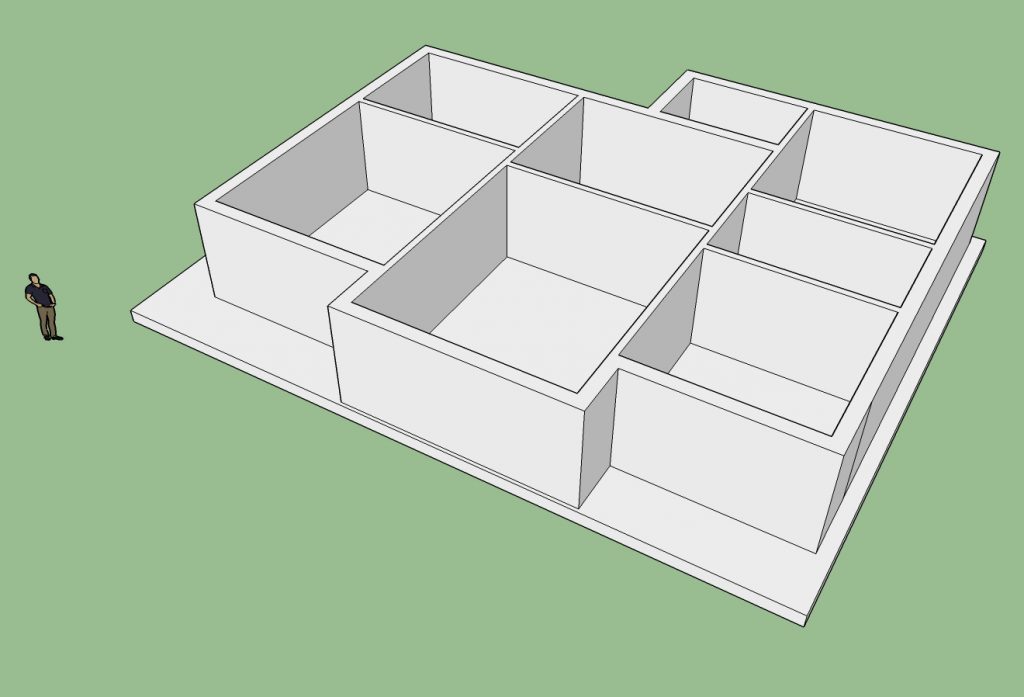
Now use the Push/Pull to raise the walls to exactly 8′ high.

Walls

Walls

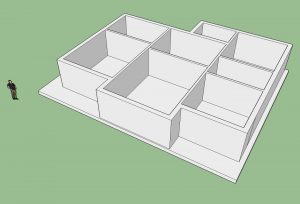
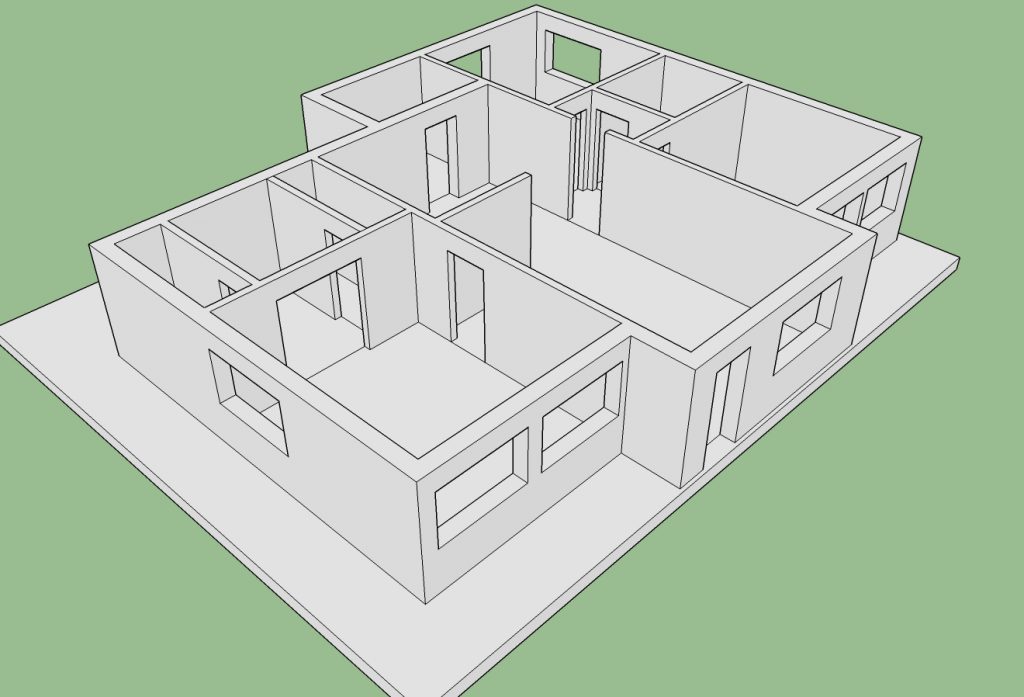
Here is your basic building!

in Section 3a, we will move on to detailing it to actually look like a house. Doors, Windows and textures! We WILL be seeing our old friend the PushMe/PullYou again, and I will also be introducing the Sketchup Warehouse!
Until next time!

Part Three, Section 2

SketchUp Two. Copying, Scaling and Detailing.

In my previous post (SketchUp – A Beginner’s Guide), I introduced some basic concepts of the 3D modelling software. How to make and move basic objects.

Now we move on to slightly more advanced (don’t worry, not very advanced! We’re taking baby-steps here!) techniques.

Copying

Once you have an object, it is a simple matter to duplicate it. Actually,. it is several simple matters, depending upon your preference.

Select your object. You may notice that only part of the object is selected! We need to cover this first!

Selecting Objects

The Select Tool - Top Right of screen

The Select Tool – Top Right of screen

Using the Select Tool, you can select a single line or face. Or you can drag a box around an area, selecting everything withing this box. WARNING: This may accidentally select hidden sections! To avoid this, we can try several options:

First, extra-clicks. A single click will select a single item, such as a Face or a Line. Double-Clicking will select a Face and surrounding Lines. A Treble-Click will select ALL connected items! This is very useful fro a free-standing object, but care must be taken when you  have interconnected objects!

A way to avoid interconnected objects is, as mentioned before, to make your objects into Components. This will stop them from interacting with other objects, and make them easier to select individually.

A third way is to drag a box around your object, but this has the danger of selecting unseen items, such as the rear faces and lines.

I recommend Components.

Back to Copying

Cut Copy Paste

Cut Copy Paste

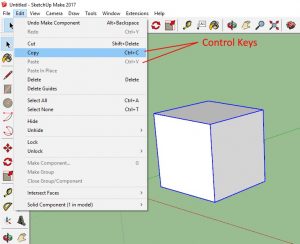
Now we have selected an Object, we can use controls that are very familiar to some people, as they are the standard Windows Copy/Paste functions. On the Edit Menu, choose Copy. Simple as that. This stores a copy of the object in the computer’s “buffer”, ready to insert into the scene. To do this insert, back to the Edit Menu, and choose Paste. (For those unfamiliar with the terms “Cut”, “Copy” and “Paste”, they refer back to when work was done on pieces of paper, and literally Cut with scissors or a knife, and then stuck into place with a glue or paste.)

The more eagle-eyed of you will have noticed the Control Keys noted at the side of the Menu Functions. These are keyboard shortcuts that you can press, instead of moving the mouse to the Menu, clicking on the Menu, moving the mouse to the correct option and clicking on that option! E.g. instead of choosing Copy from the menu, you can hold the CTRL key, and press the “C” key.

Now we have a copy in the buffer, either use the Edit Menu -> Paste, or press CTRL-V to Paste the Item into the scene. To begin, it will be “floating”, and you can move it to the required position, before clicking to actually place it.

Scaling

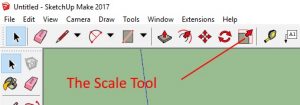
The Scale Tool

The Scale Tool

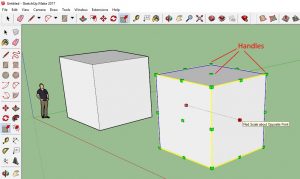
You may create an object, and then want to make it a different size, or have a copy of an object as a different size. This requires the Scale Tool. Select the object you wish to Scale, and then click the Scale Tool. You will see lots of yellow “handles” appear over the object. These can be use to drag/stretch the object.

Scaling Handles

Scaling Handles

Some handles will only stretch in certain directions, while the corners will stretch all dimensions. Try some, and see how it works!

As with other functions, the Dimensions box in the very lower right of the screen will keep a track of how much you are scaling the object. And, as an added extra, you can type a Dimension to set it exactly! Start pulling a handle, and then type 2 <Enter>, and your object will be Twice the size! type 0.5 and it will be half as big as it started! Useful for when exact ratios are required. And an extra bonus feature, you can scale it to an exact distance! Try stretching and then typing 6″<enter>  or 3m<enter>. You should see the object become the size you indicate!

Detailing

It is quite rare that all you will want in a scene is a plain cube, or even several cubes of different sizes. So we need Details. There are so many different ways we can alter an object that I can only discuss a few in this article.

We shall start with the

Push/Pull Tool

Push/Pull Tool

Push/Pull Tool

A very useful feature, this allows you to move a face, or part of.

To Push/Pull a complete face, simply select the Tool, and hover over the Face you wish to move. You should see the familiar blue spots, showing the selected face. Holding the left mouse button down, you can Push/Pull the face. Notice how the Snap Effect can be used to line up the face with other Objects in the scene.

Push/Pull Examples

Push/Pull Examples

To move just part of a face, you must section it off using the Pencil tool. Draw a line splitting the face, and then proceed as before.

The examples (right) show (l-r) a cube with the whole face pushed back, one with a line splitting the front face in half, and the right pushed back, and one with a design Drawn on, and then Pulled forwards!

NOTE: If you are working on a Component, you must first double-click the component to make sure you are working within it, rather than on the main scene. Also, be aware that alterations made to One component will affect all copies of that component!

This tool can be used to create many effects, including removing a section from an object by Pushing it until it is level with the opposing face (Snap Effect!).

We’ll leave it there for today.

Practice with these tools, and experiment with creating your own Objects.

Let me know how you get on, and the best examples I receive might get featured in my next post!

Happy SketchUping!

Part Three

Sketchup – A Beginner’s Guide

Sketchup 3D design software from Trimble (previously from Google) is a very simple, yet powerful, program. Starting from basic shapes, you can build up to elaborate designs, ranging from small engineering components to vibrant cityscapes.

A lot of people are put off from using 3D design packages as they see them as complicated and fiddly, but with Sketchup, this is not true at all!

Here I would like to look at some of the most basic features, and how they can be used to create advanced designs.

I will be walking you through features, so it will help to have Sketchup running, and switch between it and this page (You know how to use ALT-TAB, yes?)

To Begin

The Opening Screen

The Opening Screen

Obviously you will need to download, install and open the program. It is available here:  https://www.sketchup.com/

Once you  have it up and running, you should see the Main Screen, with tools all around. We shall be learning what some of these tools are for.

First, though, some basic controls. I would advise trying these now, to gain some familiarity

  • The Mouse Wheel controls zooming in and out. It will focus on where the mouse pointer is, so scrolling out, and then back in can be a useful way of moving around the scene.
  • The Mouse Wheel also controls the angle you are looking from. Holding it down, and moving the mouse will rotate the camera.
  • Left-Clicking will select an Object. You can tell it is selected by the Blue border it gains. You can also do this by dragging a Selection Box around an object, but this will select EVERYTHING it contains, so use caution!

Adding Objects

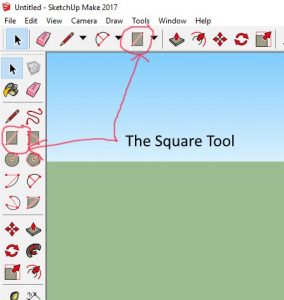
The Square Tool

The Square Tool

Your scene is currently quite bare, so let’s add some features! Strangely, for a 3D program, we do not add 3D shapes. We draw 2d shapes, and extrude them. This is easier than it sounds!

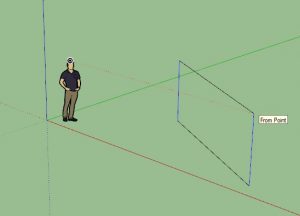
Begin by selecting the Square tool, from either the Top or Left Menu. Your Mouse Pointer will change to reflect the current tool (as always). Click where you would like to begin, and move the Pointer around. You will see the Shape begin to form. If you move around enough, you may notice the useful Snap effect. Sketchup tries to guess if you wanted to line up with something, and “snaps” to be level with it. We will not use this now, but be aware of it as you go forwards.

Snap Effect in action

Snap Effect in action

In the bottom right-hand corner, you will notice the “Dimensions” area. This shows the dimensions of the Object you are creating. It also allows you to directly enter the Dimensions you would like. Try making a square 10 feet by 10 feet. Watch the Dimensions area, and do not worry about being exact. Once you have clicked to place the square, ,type “10, 10” (without quotes), and hit Return. You will notice that the square becomes exactly 10 inches by 10 inches! You must put a ‘ (apostrophe) after the number, to signify Feet! Try again! (Pro-Tip: CTRL-Z will undo your last action(s))

You can now test some of the Selection methods. Choose the Select Tool (an Arrow, like a normal Mouse Pointer), and try clicking an edge, or the face. Try double-clicking.

The Third Dimension

Cube

A Cube! (Sort of!)

You have a square, but we want a 3D object! So, select the Push/Pull Tool, and move over your Square. You should notice the face become ‘spotty’, to show that it is selected. Click on the face, and move the pointer. The face will “extrude” to form a solid. Again, note the Dimensions area. You can try to get the right height for your box, or click in approximately the right area, and then type the distance you actually wanted!

Groups and Components

Before we go further, I can’t stress enough about using Groups and Components! USE THEM! Select a complete object by treble-clicking on it with the Select Tool. This Selects all connected edges and faces. Then press “G” (for “Group”). This locks the object, allows it to be manipulated independently of the rest of the scene, and moved as one piece.

It also allows you to replicate objects without having to recreate them, using less memory and being able to edit them all at once!

If you move normal pieces together, they will connect. This is good if you want them to, but you cannot un-connect them without a lot of work. Groups or Components that touch will “Snap” together, but you can move them apart easily! They are effectively their own “mini-scenes”.

NOTE: To edit an object once it has been made a Component, you need to double-click it to “enter” the component. Or “Explode it, making ti a non-Component again.

Moving Objects and Components

The Move Tool

The Move Tool

I get a lot of use out of the Push/Pull tool, so watch closely!

Adding pieces is easy enough, especially using the “Snap” effect. Make two cubes of different sizes. Make them into Components. Click on the “Move” tool. Hovering over an object will outline it in blue to show it is selected. You can “grab” any part of it and drag it around. The Snap effect will try to guess if you are moving it along an axis, or you can hold the cursor keys to force it to lock the movement to an axis, if for example, you only want to raise the object without affecting its horizontal position.

If you “grab” an edge, or corner, you can take advantage of the Snap, and line it up with another object. Try this with your two cubes. Put the smaller cube on top of the larger. Rotate the View to make sure they are in the right place, with no gaps.

Summary

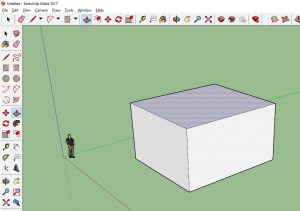
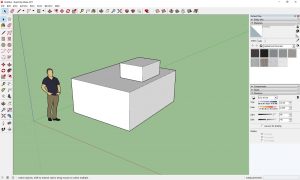
Two "cubes"

Two “cubes”

You should now be able to create and move blocks in your scene. The best idea now is to practice this, creating blocks of specific sizes, placing them together in specific ways.

Do not forget to save your work!

Have a go at this, and let me know how you get on!

The next part will deal with some other basic techniques. If you have any features you wish to know about, feel free to let me know!

Part Two

New Fangled Gadgets

Why, back in my day …

The height of sophistication!

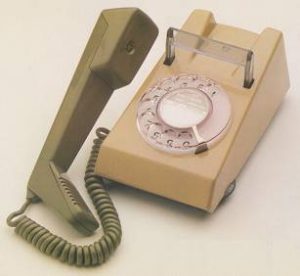
Trimphone! The height of sophistication!
… we didn’t have mobile telephones. We had one “land line”. In the hall. (Actually, due to Dad being paid “in-kind” rather than in cash for one job he did, we were one of the few families who had multiple phones in the house, but I digress). It had no “speed-dial”, or saved numbers. Just a ring of digits that you could dial individually to make up the required Number. If someone else was using it, you had to wait. If you were using it, you had to endure a parent glancing at their watch, and tutting (especially if it was before the 6pm cheap-rate!). The lack of privacy became noticeable as teenage years arrived. I recall changing my pound notes(!) into 10p coins and going to a local “phone box” in the village, rather than have my family overhear conversations with my friends. Ah, good times …

Or was it? It may sound like the moanings of a pre-Millennial, but we did get by without them. Mostly. Sure, I missed a few good parties because people couldn’t contact me. I failed to talk to a local girl I fancied because both of us were being eaves-dropped on by parents. I annoyed some friends because I missed the bus, and they had to wait around, not knowing whether I was on my way or not. But we got by. Mostly.

These days …

iPhone - new-fangled gizmo

Dang new-fangled gizmo

… I see too many of my generation (and previous generations) bemoaning the very existence of Global Communication Technology. They take that last paragraph I wrote, and turn it into a crusade. “Kids these days are not social” … “they don’t play outside” … “they have no real friends” … “We got by without mobile phones!”

Who do they think kids are talking to on their phones? I understand the dangers of ‘strangers on the internet’ (better than most, my alter-ego being PC Wizard), but mostly, they seem to be communicating with their school-mates. Arranging when to meet down at the local park. Checking who is going to the football match at the weekend. Apologising for being late, and finding out where people will be. Checking that their mate who hasn’t arrived is OK. Swapping gossip, and giving out #spoilers for the latest TV shows (“Netflix”, I think they watch, these days).

Yesterday:

I went to my niece’s first birthday party. It was a wonderful affair, with family and friends gathered to wish my niece and her parents the best for the future.

I got my invite via Facebook, and texted Lucretia to arrange our attendance. I checked the location, and driving directions, from my mobile phone. We kept in touch with everyone, complicated by Lucretia’s recent illness*, via TXT, Facebook, voicemail, and email.

Would I have attended without mobile phones? Probably, but it would not have been so easy.

The Future:

Mobile technology is not going away. People who are new to it will get used to it. The newer generations will have grown up with it, and wonder how we got by without, in the same way that we wonder how the world worked without radio, motorised transport and frozen food.

It seems odd to think that the iPhone is only 10 years old. We have come so far, to be able to carry a mobile computer, capable of linking to the Global Superhighway, and processing data faster than our forefathers thought was possible. The main question it leaves me with is: What next for mobile technology?

3d Printing is becoming more common, but feed-stock currently precludes it from being truly portable. Bio-monitoring (heart-rate, pulse, sugar levels etc) is advancing. Augmented Reality may attempt to surface again, although Google Glass failed to take off, and Pokemon Go is ‘only’ a game. The veil between the “real world” and “cyberspace” is breaking down, and who knows where that will take us!

We should not mourn the loss of the past, but rather celebrate the onrushing Future, and grasp it with both hands, lest it slip past us!

*Another example of how Modern Technology helped us to communicate! Her days at the hospital were greatly eased by being in constant (txt/Facebook) communication with her nearest and dearest, even though they could not be physically at her side.